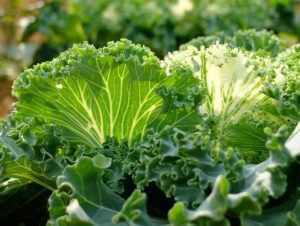
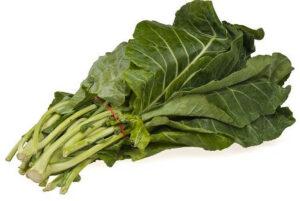
 Collard greens are vegetables that belong to the cabbage class; they are tasty and have a relishing taste. They are used in several recipes and this gives them a wide range of use for preparing various dishes. In this post, I’ll show you how to freeze Collard Greens.
If you would like to preserve some of your greens for use for a later time which is about 10 to 12 months long, you can rinse and boil them for some minutes.
After cooling the collard greens, store them in a cooling safe plastic bag where you can keep them for up to 10 to 12 months. After then, you can enjoy using your collard greens as an ingredient for your meals for the next few months.
Part 1 (Boiling Greens to Retain the Taste and Texture)
1. Rinse the Collard Green with Cold Running Water
The first step is to wash and clean the two sides of the leaves, do this under cold running water and ensure you remove dirt and insects as you wash them. Use your fingers to remove all visible patches of dirt on the leaves. Once you are done washing the leaves, place them separately on a dry paper or cutting slab.
You can also place the collard greens inside a sieve to rinse them. However, ensure that both sides of the leaves are properly cleaned if you are using this process.
Did you know that..Boiling (also known as blanching) your collard greens helps you put a stop to the actions of enzymes which normally lead to change in coloration, change in texture, and spoiling of the leaves?
Even though boiling is actually not a compulsory step in preserving your collard greens, it is advised for people who want to keep their collard greens for a longer time than a year. If you only want to freeze your collard greens for a few weeks, you don’t have to bother about the boiling step too much.
2. Trim Off Excess Stems from the Leaves
With the aid of a knife, trim off the collard greens till only the leaves are left. At this stage, you can cut the greens into smaller chunks. It is not compulsory to cut them into fine pieces, cut them into two if you find it necessary.
It is easier to store the smaller pieces than the bigger ones and they are easier to use while cooking in the future as this will save you the stress of cutting when you want to use them.
3. Boil Some Water in a Large Pot
Fill up a pot with enough water and put the collard greens into it; make sure the water level is above that of the greens (the leaves are totally submerged in water). Increase the intensity of heat from the heating source and place the pot on it to enable the water to boil faster. Before you continue, let the water boil for a while.
The use of boiling water is very important in order to remove the raw outer surface layer of the leaves.
4. Leave the Collard Greens to Boil for About 3 Minutes
Put the washed collard greens into the pot and pour water into it, make sure the water covers the leaves. Use a toothed tong or wooden spoon to push down the leaves that are present at the surface in an attempt to submerge all the leaves.
To keep the temperature of the water hot, cover the pot with its lid and leave the leaves to boil for 3 minutes on fire. The process of boiling the collard green is otherwise known as blanching.
Part 2 (Packaging and Storing the Collards Green)
1. Cool the Boiled Leaves in a Bowl Containing Ice Water for 3 Minutes
Fill up a bowl with cold water and place ice cubes in the bowl. Use the toothed tong to transfer the greens from the pot into the bowl of ice. After transferring them, leave the collard greens in the bowl of cold water for about 3 minutes in order to stop the cooking action from taking place on the leaves.
If you have a lot of collard greens you want to store, you can cool your leaves in the cold water in batches
2. Drain out Excess Water from the Greens
Place the wet leaves in a sieve, hold it over a sink, and drain the water. Wait for a while to allow all the water to drip out, you can also shake the sieve to bring out the remaining droplets of water present in the leaves; once the collard greens are no longer dripping with water, put the sieve aside on the tabletop.
If there are still some droplets of water on the leaves when they go into the freezer, the extra water also freezes alongside the leaves.
Even though it is okay for the leaves to be a bit wet, you can dry them up with the aid of a paper towel.
3. Place the Leaves in a Freezer-safe Plastic Bag and Seal it
After draining out water from the leaves, put the collard greens aside in a big, freezer-safe plastic bag. Ensure that air is not trapped in the bag while packaging it. Leave a space of about 0.5 inches (1.3cm) at the top of the plastic bag; this will enable you to seal the bag more easily.
If you have many collard greens that you want to package, you can use more than one bag to store them.
4. Put the Collard Greens in the Freezer and Use those Within 10 to12 Months
Put a label on each of the plastic bags showing the date the collard greens were actually stored; this will help you keep a record of when you actually stored them, and hence you will know they will be due for use.
In order to preserve and retain the taste of the collard greens, try to consume them within a time frame of 10 to 12 months.
Conclusion
Did you know? Sometimes, you might not have to bring out your collard greens and reheat them when you want to use them but this actually depends on your recipe. If you want to heat your collard greens quickly, put them in a pot containing boiling water until they look soft enough for use in your recipe. Make sure the collard greens are properly drained before using them to cook. Check out your recipe ahead of time; this will enable you to know if the collard greens are to be thawed or not.
Hope you enjoy reading these articles and if you have any question about or any suggestions please leave your message below and I’ll be happy to write back to you.
joyceeaston.com

Bella
Thank you for sharing this invaluable and superb information about collard Greens. The beauty of cooking is that there are various recipes that achieve different results in cooking food so it is always nice to learn and try something new other than what you were formerly stuck too in terms of recipe.
admin
Hello Bella,
Thanks for dropping to my website, reading my articles about how to freeze collard green, yes if you have plenty of these vegetables that you can not consume for the moment, its good to preserve them just follow all the guides, I am sure you’ll still eating fresh veggies like collard green.
Thank you so much,
Joyce
Cynthia
This is great information…thank you for getting it out there! It’s always the way, isn’t it? You work all seaon to grow a successful garden and then you have to figure out what to do with all the bounty. This is a perfect solution to enjoying our own organic vegetables all year ’round! Since we have websites that interconnect (mine is about healthy eating and food preparation), I have shared this page on my business FB page. I’m certain that my subscribers will find it to be of value!
admin
Hi Cynthia,
Thank you so much for visiting my website and reading my articles about jow to freeze collard green. That’s a very good idea to share to your own page so people Will know how to preserve collard green for a couple of months.
Thank you so much.
All the best,
Joyce